


Room Automation v2.0 Let's do voice recognition
- dheerajgsr2020
- Sep 9, 2020
- 6 min read
Updated: Sep 11, 2020
Most improvements following the last blog are incremental, like boot time reduction and change in the program structure so that the IR remote can be used even while the PIR sensors are booting up. But once in a while, a major hardware improvement took place.
Lets look at one such upgrade in a little bit of detail:
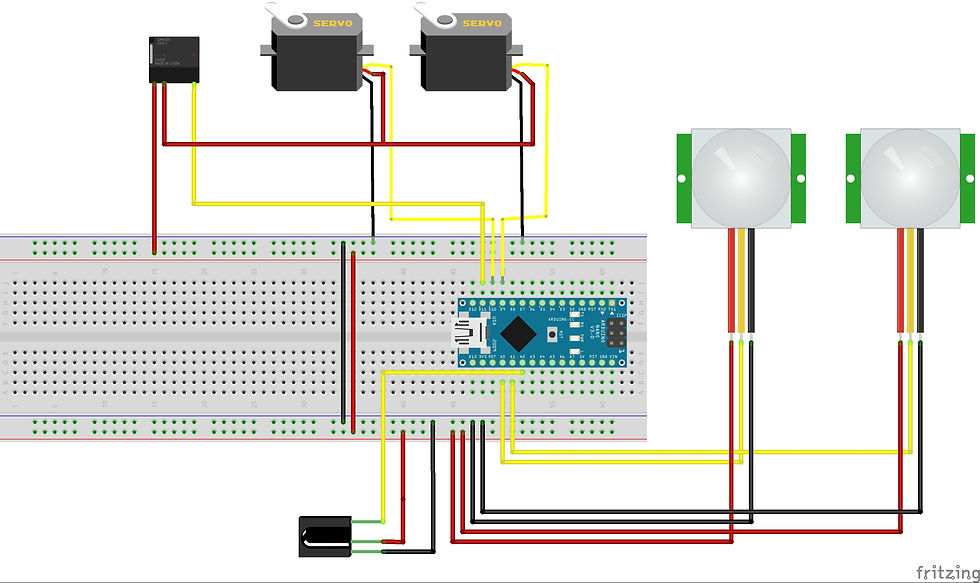
A servo was replaced as the old one burnt out. But the new servo drew a bit more current even when it was idle, this would lead to the Arduino resetting every few minutes. To solve this, I added a bigger capacitor in parallel to the MCU but that didn't solve the problem completely. So finally I isolated the servo power input from the rest and added a relay so that the servos are 'turned on' only when the servo is being used. This relay is attached to a pin called SERVO_EN and is written HIGH every time the servos are required to operate.
This was quite a significant change and that is why it deserves to be mentioned. It is required here because more hardware was added in this version and yes, it is voice recognition.
Overview
Voice recognition is a novel way of interacting with many of our devices through virtual assistant programs. But here, the focus is voice recognition and not on making a virtual assistant, although it is the long term goal, but obviously not on a micro controller. But even for a microcontroller, voice recognition or simply put speech to text is a mammoth task, so I settled on using a voice recognition module to just save on time and resources.
But this is more of a 'how it is used in this project' report rather than 'how to use' tutorial. So to give you a rather simple explanation on how it works, the module is trained on certain voice commands which are associated with a unique string and an index is assigned to them in the training process. After the training is complete, the module is then initialized to the code that we want to use it on. The module has its own library which handles all the data and all we need to do in code is call the library functions like the begin() to start serial communication and also use load() function to load the pre-stored voice data and just wait for the module to return the index whose command it hears.
Components
The specific module is the Elec house voice recognition module v3.
This is a very helpful Instructables post if you wish to learn more:
Most of the other components are the ones from our previous project, so if you would like to know more about that I would suggest you read my previous blog.
Additional components
The relay module is a 5V logic level module. I have used a SPST module because switching is required on the Vcc supply of the servo motors.
I have also used an IRF510 n-channel MOSFET for switching of the LEDs.
Circuit explanation
The circuit is pretty similar to the previous version except for the changes in the servo powering circuit. The relay is a 5V logic level relay that has a low current rating as the servos do not draw any more than 1 amp.
Coming back to the Voice recognition module, it can be connected to the microcontroller on any pin and as it communicates using the serial interface, the pins can be defined as the serial pins in the setup by using the begin() function. It can be connected as shown in the module's example circuit.
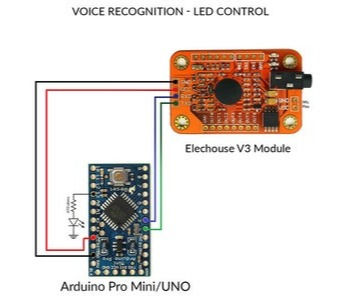
Lets take this opportunity to discuss the way the module is connected to the nano from our project. The pins RXD and TXD of the module are connected to the pins 11 and 12. The pins are defined in code to enable serial communication through the pins.
Program explanation
Programming the voice recognition module is pretty straightforward. The training code is taken from an example from the library and the training is completed. Later in the setup part of the code, the pins can be assigned for serial communication and the begin() function starts the serial communication between the module and the Arduino nano. Then the commands need to be loaded into the recognizer on the module so the module can wait for the commands to be heard. The recognizer can store up to 7 commands at a time. The labels like On, Off, etc. are predefined int constants which are the indexes of the corresponding commands as stored in the module.
    VR myVR (11,12);             //Assigning serial pins

    myVR.begin(9600);            //Beginning serial communication
    myVR.clear();
    myVR.load((uint8_t)On);      //Loading required commands
    myVR.load((uint8_t)Off);
    myVR.load((uint8_t)lamp);
    myVR.load((uint8_t)Mode);
When the module detects a command that it has been trained for, the recognize function returns an index of the command as stored in the module. This is an integer value that is received on the Arduino and stored in a local variable. The index can then be checked in a switch case and the corresponding pins or servos can be activated.
ret = myVR.recognize(buf, 50);
  if (ret > 0) {
    switch (ret) {
      case On:
        digitalWrite(SERVO_EN, HIGH);
        lampSel(def_lamp, on);
        mode = 1;
        break;
      case Off:
        digitalWrite(SERVO_EN, HIGH);
        lampSel(def_lamp, off);
        mode = 1;
        break;
      case Mode:
        if (mode == 0)
          mode = 1;
        else if (mode == 1)
          mode = 0;
        break;
      case lamp:
        digitalWrite(SERVO_EN, HIGH);
        lampswitch();
        break;
     }
   }
This is a function called the voiceRecogLocal() and this is called wherever the voice recognition is used. This function runs irrespective if the input being PIR sensors or the IR receiver, in other words it does not depend on the mode variable. Therefore this is a piece of code that runs continuously which is a source of error that will be discussed later.
The board:
After making a prototype on the breadboard, for a more permanent setup, the components were soldered onto a general purpose PCB and the corresponding routing was completed.
Finally the project looked something like this
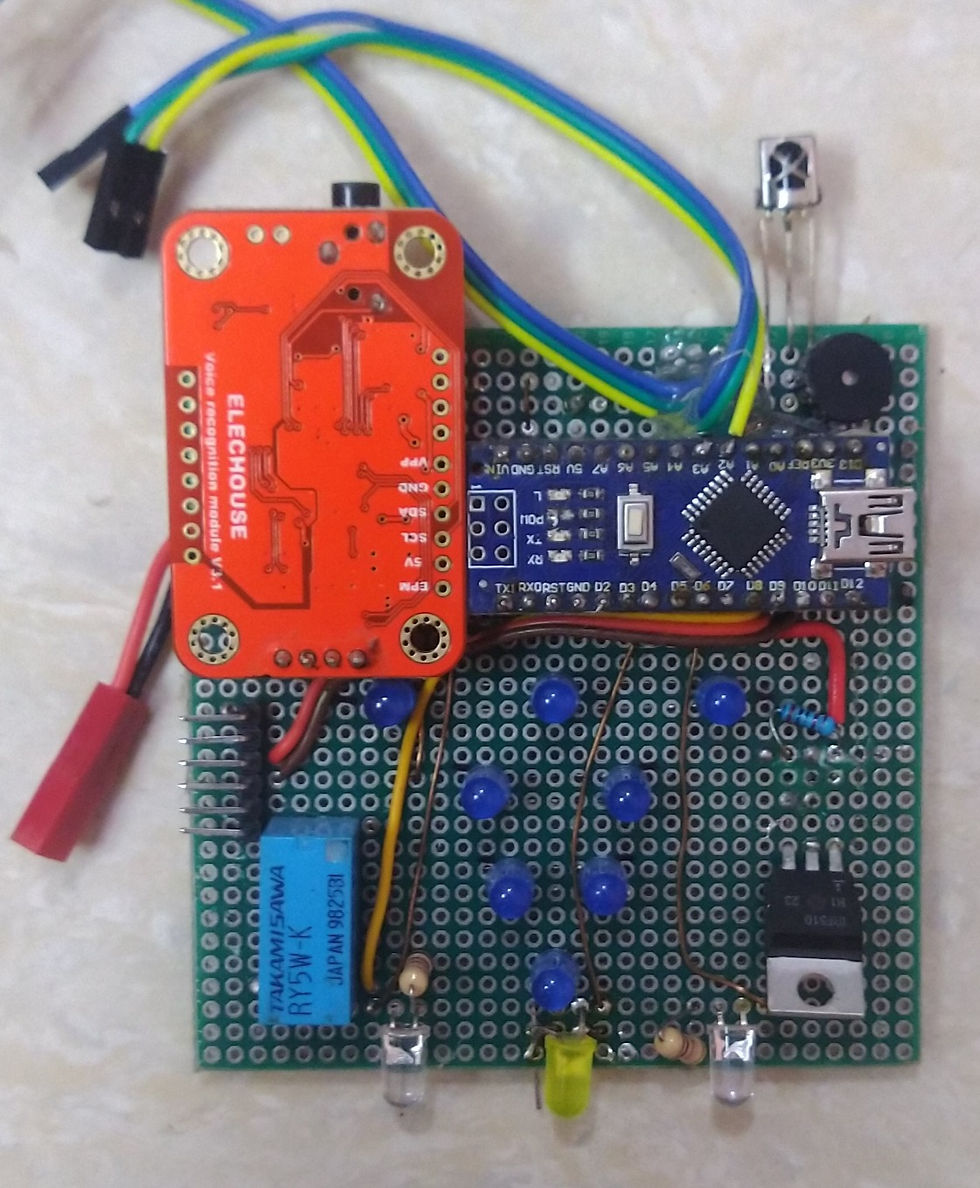
The Nano and the voice recognition module are mounted on pin headers so they can be removed. The LEDs are driven by a MOSFET to handle some higher current. The relay is in the lower left part of the image and is used to control the servo power.
The final setup looks like this with the pir sensors and the servos.
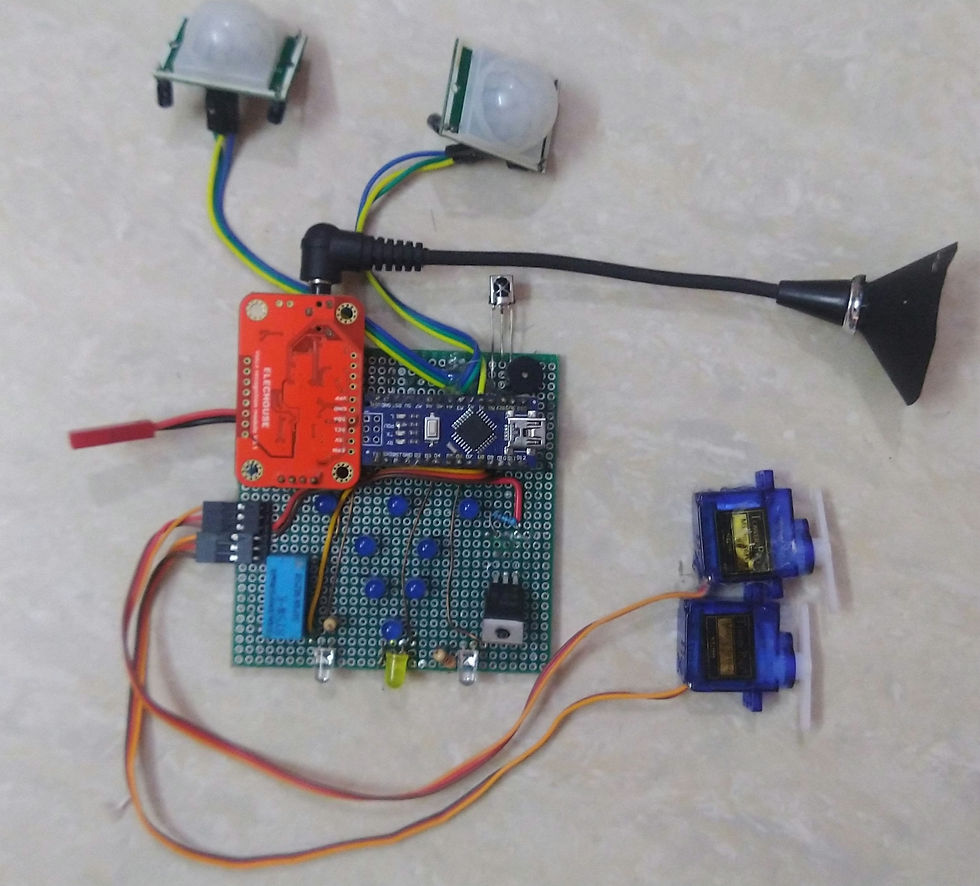
The microphone connects to a jack on the voice recognition module and the servos connect to the pin headers on the board. The layout is managed so that it matches the wiring sequence of the servos. The PIR sensors connect to their own set of wires that are soldered onto the board.
Working
Rather than explaining the working of this, here's a video of the project shown with its functionalities demonstrated.
Tips:
The way this project manages the voice input is a source of error. The microphone is the first point of error. A good quality microphone is required to have a good audio signal. The mic needs to be able to reject ambient noise and receive the commands without much disturbance in the data. Since the microphone used here wasn't all that great, I had to try various methods of dampening that noise. That is exactly what the fancy cone around the mic is all about. Another obstacle was due to the fact that the voice recognition function ran perpetually. This sometimes caused the voice recognition module to pick up on conversations and even a totally unrelated word would trigger a false command sometimes causing the microcontroller to carry out the perceived corresponding action. This is handled well in other voice recognition devices like the Google Home or Amazon Alexa, both of which require a wake word before the actual command. What happens here is that the devices only hear for the wake word and not any other command so the probability that any other word sounding like the wake up word is low, versus a device that is constantly waiting for 7 different commands in which case, the probability of false triggering are pretty high.
The final verdict on the project would be that there are better methods of voice recognition but on the given resources and also, not having used a pre trained model obtained from the internet, this is a satisfactory method of handling voice commands. And it's certainly a lot cooler than operating the device with an IR remote so, for that part, this project was well executed.


Comments